
You can manage the following timesheet settings at the Client, Position or Placement level:
- Timesheet period - you can choose whether timesheets would be produced weekly, fortnightly, 4 weekly or monthly (also set the day of the week a timesheet period starts)
- Timesheet entered by - define whether the timesheet can be entered by the worker or agency
-
Timesheet approval:
- Manual (timesheet approver set at the placement)
- Automatic (timesheets are approved automatically)
- Timesheet Properties - explained below
Timesheet Properties
-
- Fatigue Management - Fatigue can lead to errors and accidents, ill-health and injury, as well as reduced productivity. Therefore, we have introduced this feature so you can track when your workers left and came back home to better manage their shifts and give enough time to rest.
- Shift time records - if your workers are getting paid per day and have a shift work, enabling this feature will allow them to enter start and finish times so you can see the actual time worked.
- Activity reference - this property enables your workers to add description of the project work they've done or enter a project code.
If you would live to see how these properties work from the worker side, please click here
Who can manage timesheet settings?
Anyone at the Agency can manage timesheet settings while only administrators at End-Hirers have access to this feature (you can find out more about roles and privileges here)
Managing timesheet settings via Client
Step 1. Log in to Engage portal
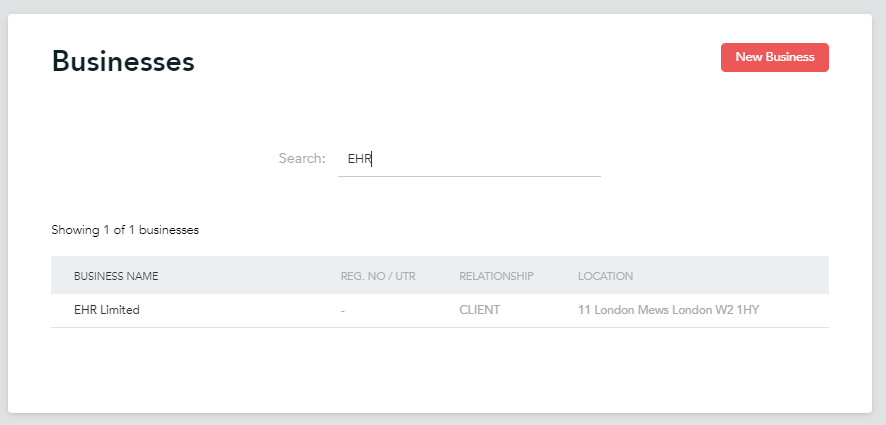
Step 2. Navigate to the 'Businesses' section
Step 3. Find the business in question and click on it
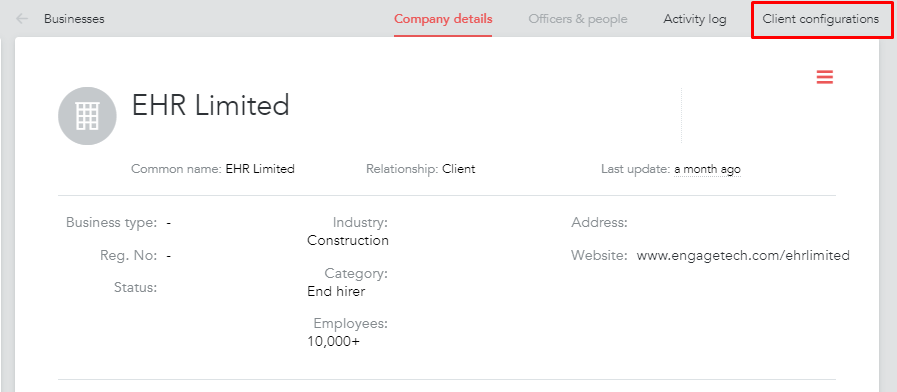
Step 4. Go to 'Client configurations'
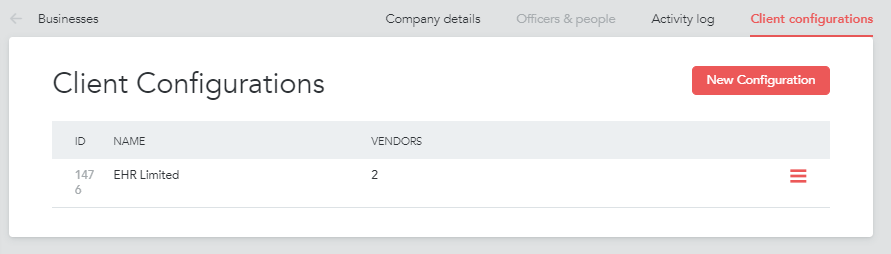
Step 5. Click on the client
Step 6. You can edit timesheet details from the 'Timesheets' tab
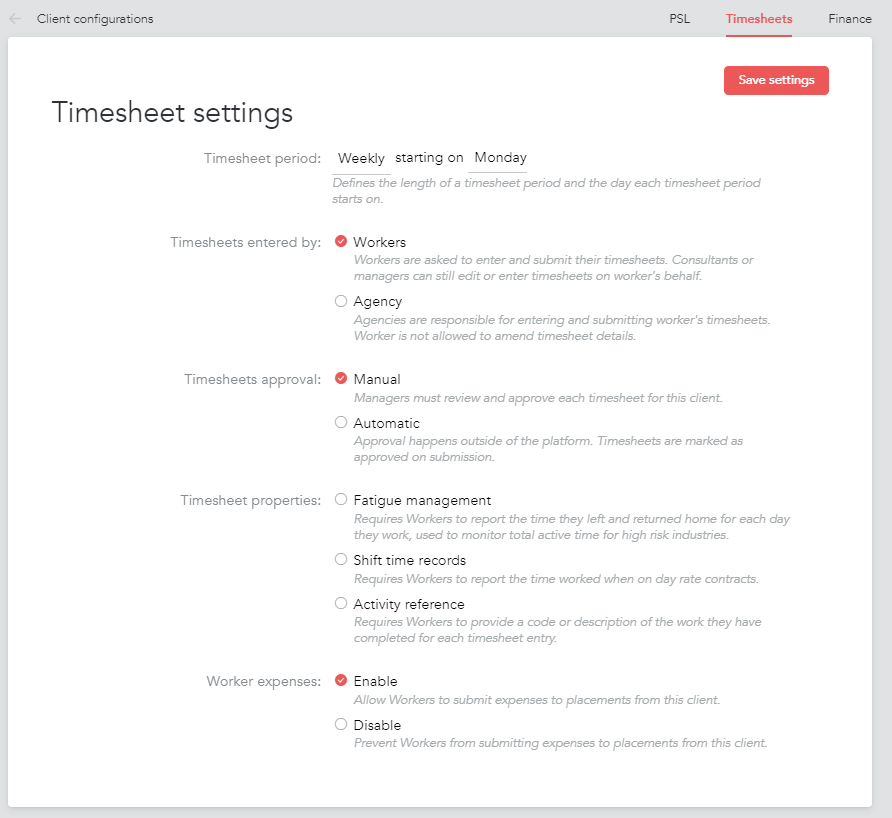
Step 7. Amend the timesheet settings as required and click 'Save settings'
Managing timesheet settings via Placement
Step 1. Log in to Engage portal
Step 2. Navigate to ‘Placements’
Step 3. Find the placement in question and click on it
Step 4. Click on the 3-bar menu in the top right-hand corner
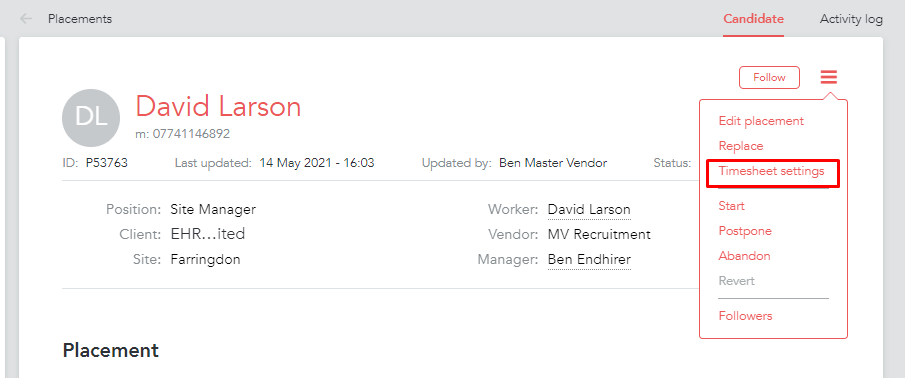
Step 5. Click on 'Timesheets settings' and amend as required
Managing timesheet settings via Positions
Step 1. Log in to Engage portal
Step 2. Navigate to ‘Vacancies’ section
Step 3. Go to 'Positions'
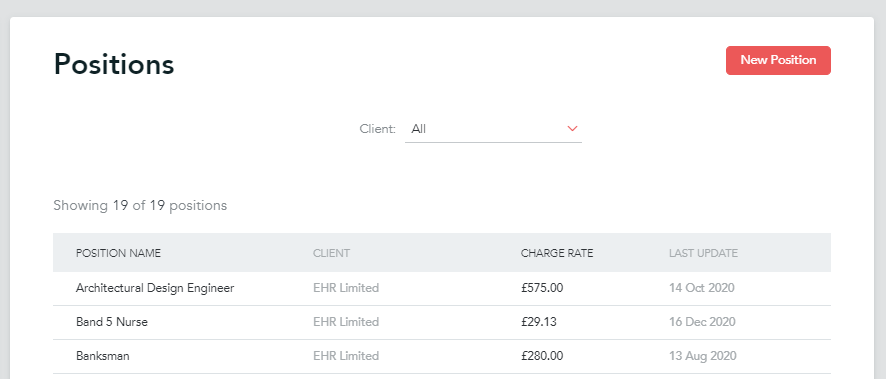
Step 4. Find the position in question
Step 5. Click on the 3-bar menu in the top right-hand corner
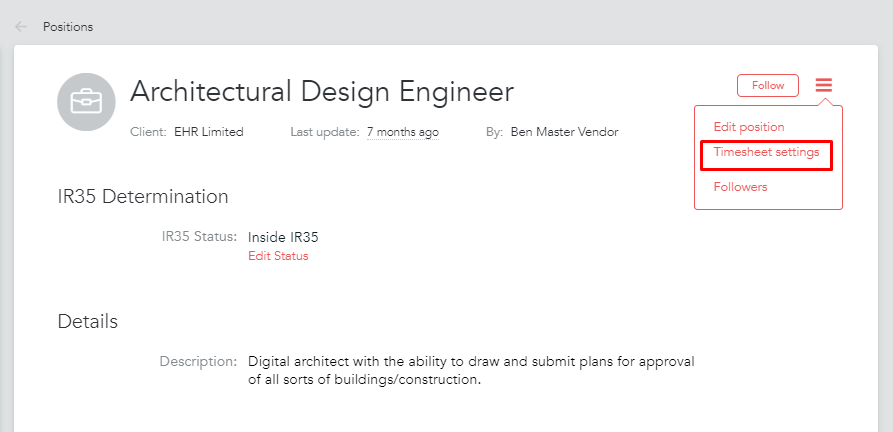
Step 6. Here you can choose to either use the Clients settings (if applicable) or set your own