
Engage allows you to configure your invoice rules and payments according to your business needs. In this article, we will go through all of the available settings.
Managing Default Invoice Settings
Step 1. Log in to Engage portal
Step 2. Navigate to 'Invoices' within the 'Finance' section.
Step 3. Go to 'Configuration' in the top right
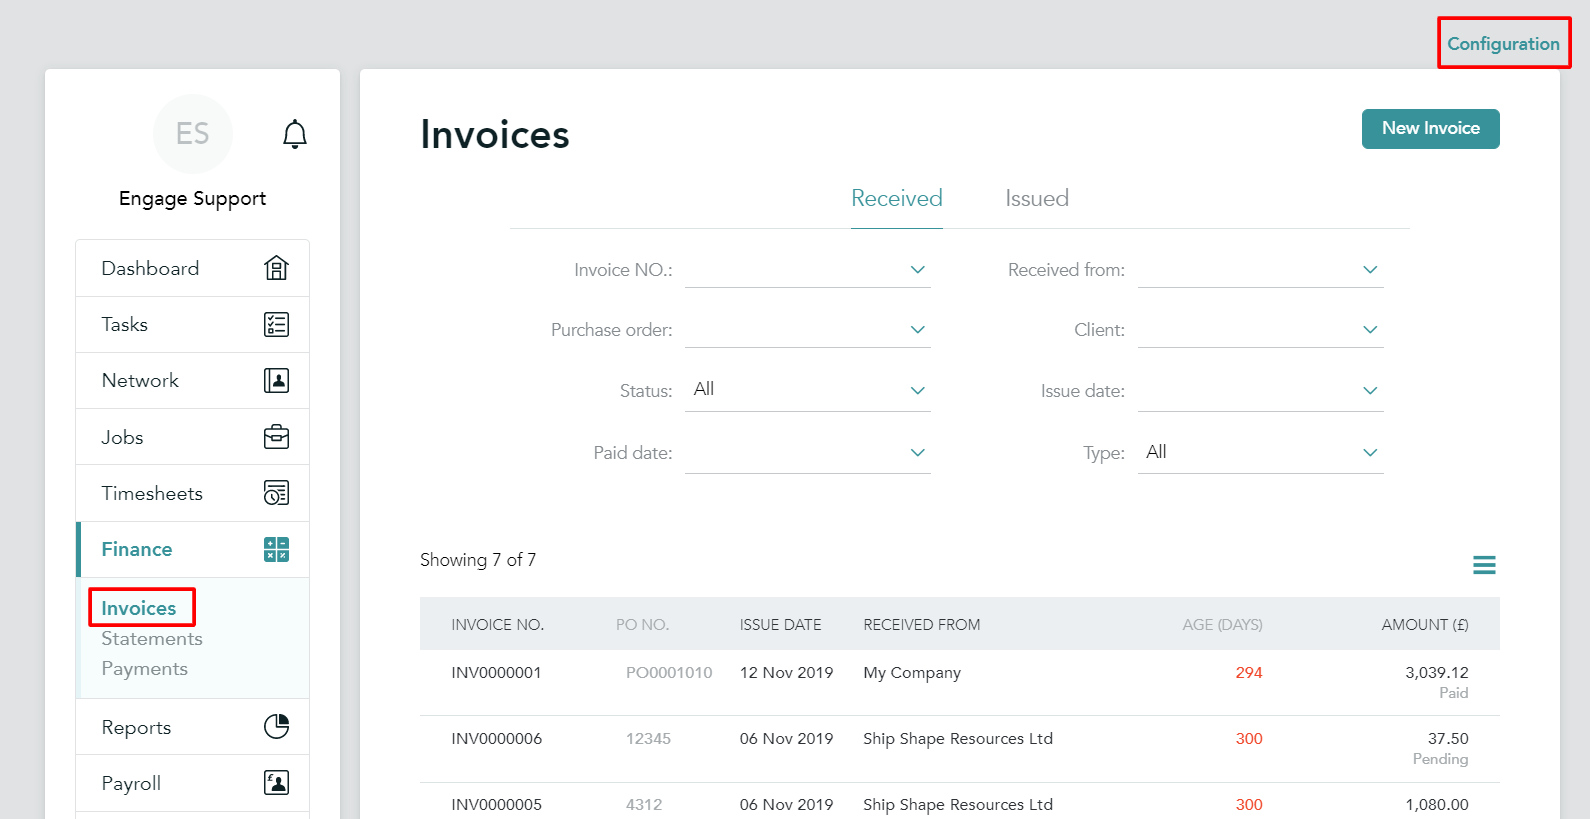
Step 4.1. Here you can see all the settings for invoices:
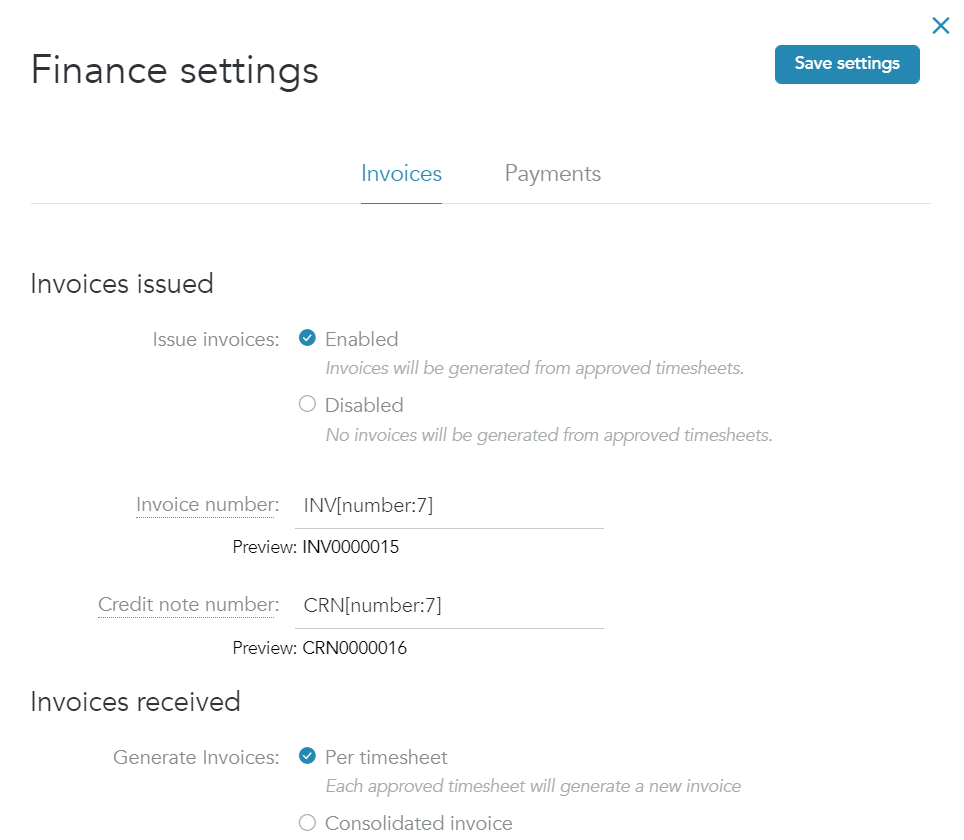
Please note!
In the 'Invoice and credit number' section, you can adjust your invoice numeration according to your business processes. It is mandatory to have a number token (from 1 to 9 placeholders) which can be combined with letters. If you are set up with 'number:3' (Ex: INV001) and reach that sequence limit (Ex:INV999), the platform will automatically increase the placeholder to 'number:4' (Ex: INV1000)
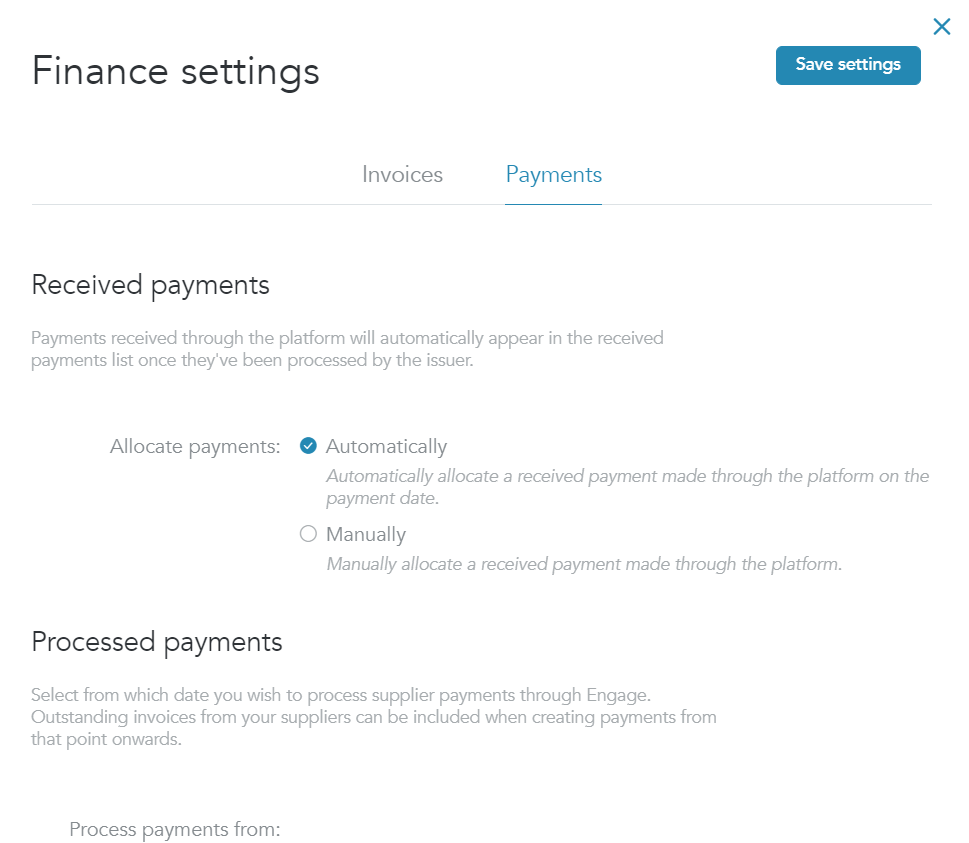
Step 4.2. Here are all the settings for payments:
Step 5. Once done, click 'Save settings'
Adjusting invoice settings per client
Step 1. Log in to Engage portal
Step 2. Navigate to 'Network' and 'Businesses'
Step 3. Find the business in question and click on it
Step 4. Go to 'Client configurations' in the top right
Step 5. Click on the client
Step 6. You can edit default invoice configuration rules from the 'Finance' tab:
Step 7. You would need to Edit the 'Invoices received by this client' section to amend the default consolidation rules for a particular client:
You can consolidate by
- PO number
- Site
- Agency
And choose the desired frequency.
Step 8. Don't forget to click 'Save settings' to apply changes